Intro/Goals
For a long time I’ve wanted to create an environment where I could run and host my own applications, and essentially have a sandbox to play with different technologies. I figured that it made much more sense to create this on a system that is not a daily driver that I can’t afford to corrupt or otherwise induce downtime on, and a dedicated server was seemingly the path that many content creators and enthusiasts online alike agreed was best. As such, I got to building a system that had enough storage, processing power, and cooling to meet my needs.
| Category | Item | Quantity |
|---|---|---|
| CPU | AMD Ryzen 7 5800x | x1 |
| Motherboard | Gigabyte B450M D3SH WIFI-CF | x1 |
| RAM | Crucial 32 GB (2x16) DDR4-3200 CL22 | x1 |
| GPU | Intel ARC A750 | x1 |
| SSD | Inland Performance Plus 1TB NVME M.2 | x2 |
| HDD | WD Red Plus 6 TB 5640 RPM | x2 |
| Flash Drive (Boot) | Sandisk Cruzer Glide 32 GB | x1 |
| Case | Thermaltake Core V21 microATX | x1 |
| CPU Cooler | be quiet! BK030 Pure Rock Slim 2 | x1 |
| Fans (Case) | Arctic P12 PWM PST (5 Pack) | x1 |
| Fans (Drive Bays) | Noctua NF-A8 PWM | x2 |
Kernel of Truth: The Best OS?
The next step in this process was deciding on which operating system/platform to begin building the server upon. Two main contenders sprung up through my research, Unraid and TrueNAS (specifically TrueNAS scale now). For a brief comparison, I’ve mocked up a table of the key differences between the two that I found most relevant, but I defer to this article and various forums (Level1Techs and LTT especially), for more in depth comparisons.
| Aspect | Unraid | TrueNAS |
|---|---|---|
| File System | Supports mixed drive sizes | ZFS (requires identical drives) |
| Data Protection | Parity-based protection | RAID/ZFS redundancy |
| VM Support | Excellent Docker/VM support | Limited VM capabilities |
| Resource Usage | Lower RAM requirements | Higher RAM needs (for ZFS) |
| Ease of Use | User-friendly interface | Steeper learning curve |
| Cost | Paid license (59-129 USD) | Free (Core version) |
| Drive Expansion | Add drives individually | Expand by adding drive sets |
| Community Support | Active community | Enterprise-focused support |
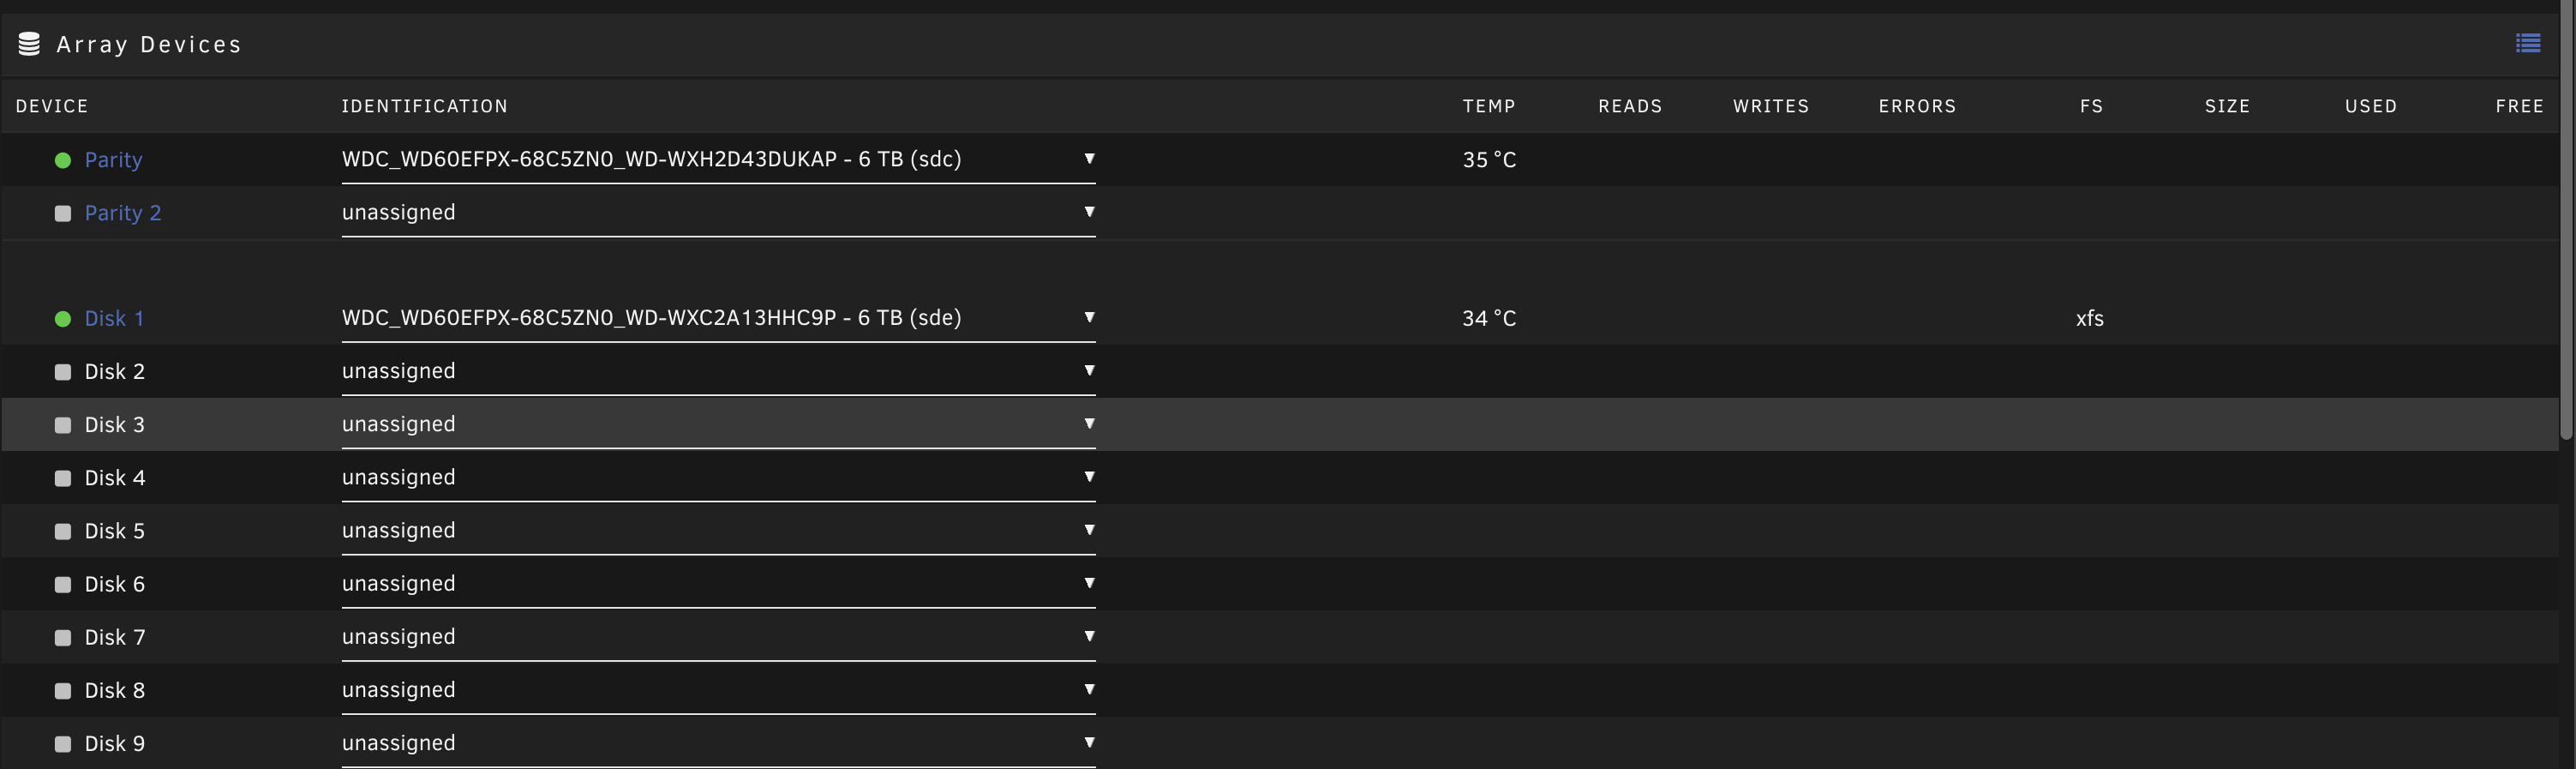
I eventually settled on the NAS-oriented and Slackware Linux based operating system, Unraid. The operating system does a lot of heavy lifting, whether it be via the implementation of core features like virtual machine and Docker management or the vast options available on the community applications store for further expansion of features. TrueNAS has (or rather had) a number of performance benefits over Unraid, but that wasn’t particularly crucial for my use cases (and ZFS, the main benefit on TrueNAS is now also an option on Unraid). TrueNAS is more common in industry, and generally regarded as more powerful overall, but its heavy enterprise focus and much greater learning curve generally turned me away from it, at least for my own personal day to day use. One benefit of Unraid, as its name implies, is that it is not a RAID based system, and so doesn’t require identically sized drives nor predefined pools. This allows hobbyists like me to use the drives they have, and easily expand their system as they go with a simple singular parity calculation upon addition.
 Ultimately, I was willing to pay the price (quite literally) to get a product that I know centers hobbyists and home users as its primary user base. It also helps that there is an added level of ease of use that Unraid provides via its strong docker support and its helpful, vibrant community. With that said, there’s plenty of customization and optimization that Unraid leaves up to you, and I’ve taken it upon myself to make my workflow fit my unique needs.
Docker
![]()
Docker is a phenomenal platform that enables the building, packaging, and running of applications in isolated environments, known as containers. You can think of these containers as distinct miniature computers that are dedicated to running a specific application with all of its dependencies, libraries, and configuration files. This OS-level virtualization allows for much greater simplicity of installation and management of distinct services. Unraid’s community applications tab allows users to publish, browse for, and install unraid plugins and docker apps with a simple one-click interface. Some standalone docker apps I was able to find in the community applications for easier installation were foldingathome, ConvertX, and UpSnap. While each of these are great projects and utilities in their own right, the other benefit of Unraid is that, provided you know how to use them, the standard docker utils allow you to install and deploy whatever docker containers you can find. For example, this project by mattcurf on GitHub allows me to run Ollama and local LLM models on my Intel GPU, and all that I needed to do was clone the repository into the correct docker subdirectory for it to show up alongside all my other docker apps in Unraid’s docker management tab. I also use Plexfor my own home media, but it’s hard for me to recommend it as of their April 29th price increases for premium functionality, so I recommend Jellyfin if you need certain functionality that Plex doesn’t offer at its free tier.
Virtual Machines
Another key benefit of Unraid is its strong support for virtual machines from installation. I personally have set up two distinct virtual machines that each serve a particular purpose. The first of these machines is my Debian VM that I use as my "master programming node". This VM has all of the code I use for personal projects and schoolwork alike, and has all of the relevant environments set up to run that code. I also of course keep a copy of all of these codebases backed up to GitHub, but the centralization of this code allows me to remotely access one version of the code, and minimizes the amount of cross-system version control I have to do. It also allows me to keep all of my SSH keys and SSH configs on one machine so that I can access any school machines or personal machines from a single machine using a simplified naming structure. I also use the VPN service Tailscale, which I'll touch on further shortly, in order to SSH into this machine as well as to enable Remote Access for tasks that require a desktop GUI. All in all, I really appreciate this component of the server, as it means that regardless of whether I'm working on my Macbook or my Desktop PC, and regardless of what OS I choose to experiment with in the future on any of my machines, my development environments will remain intact. The second machine I have is an Ubuntu machine dedicated to ROS (Robot Operating System) development for a school project, as Ubuntu is the preferred (or maybe easiest) platform to use ROS and its various packages. That VM is much newer and spends most of its time offline as I haven't had to perform much development in the form of ROS as of this writeup. Overall these two VMs have simplified development for me, and I will touch on this more in my workflow review towards the end of this page.Plugins
Here's a short list of a couple of hyper useful plugins that I recommend any and all Unraid users install.- Appdata Backup
- This plugin allows for the backup of docker container templates, their appdata, and more relevant information
- This plugin is particularly useful to prevent the need for full reinstalls of useful dockers when an update or minor change breaks configurations
- CA Mover Tuning
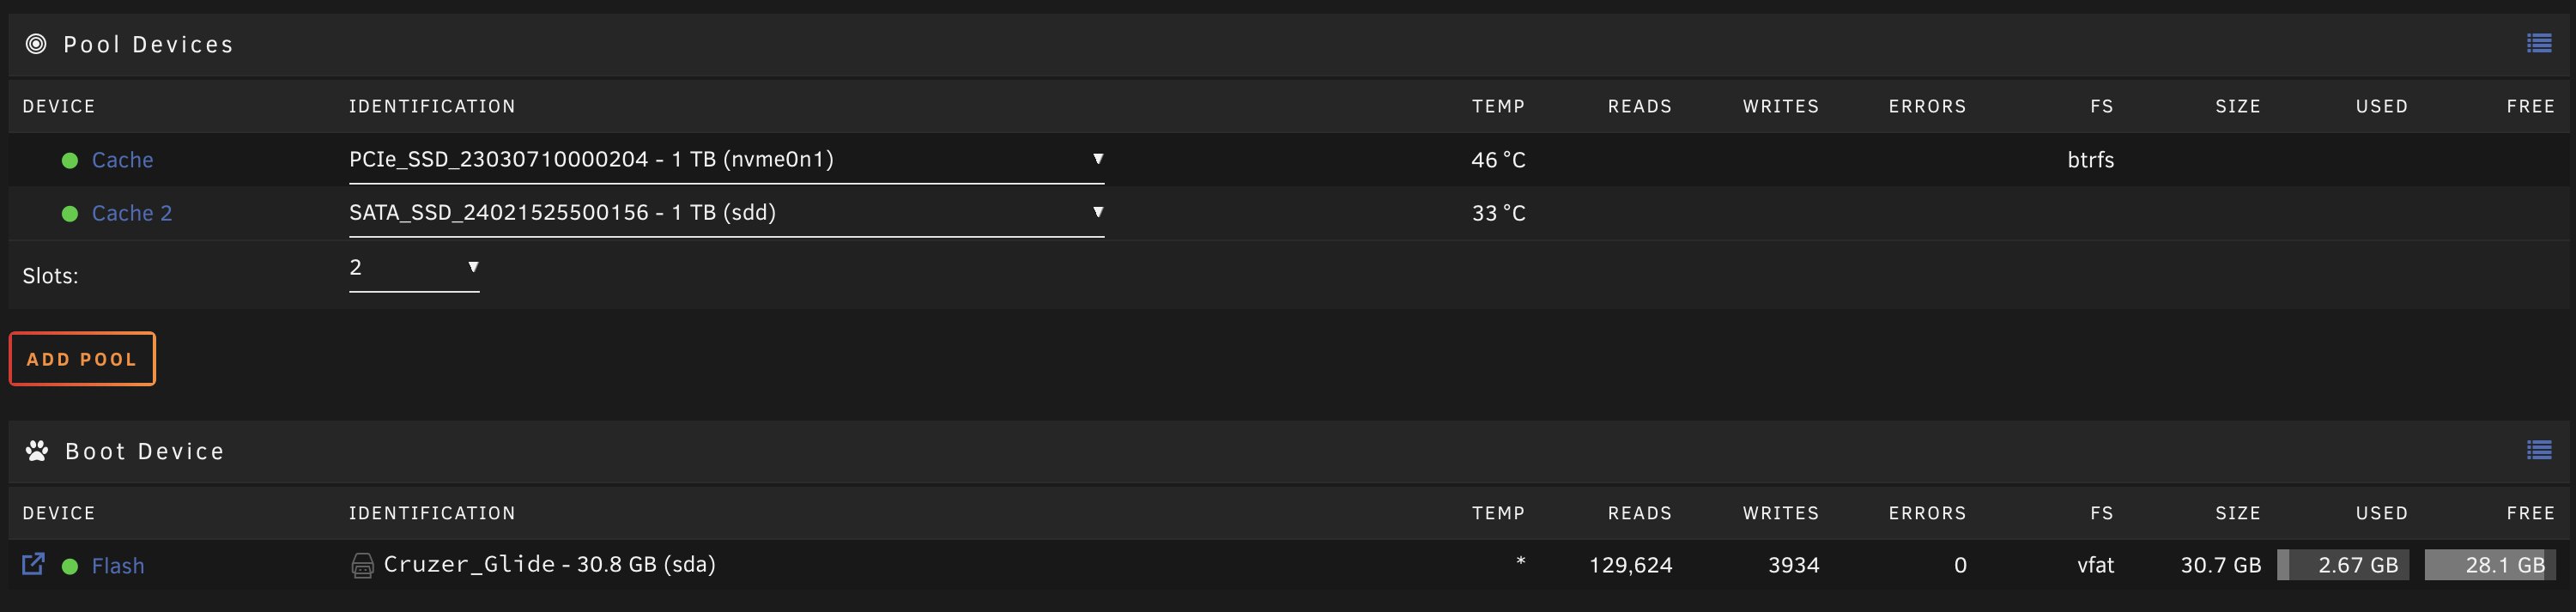
- If using a cache or mixture of media for the array and cache pools, this is a useful tool that allows you to fine tune the moving of files across drives and media types.
- Community Applications
- This plugin enables the community applications tab that I recently mentioned for finding other apps and plugins.
- Compose Manager
- Provides the docker compose package on the server and adds a simple manager page to the webUI as well.
- GPU Statistics
- This plugin allows for the display of GPU stats on the dashboard of the Unraid management system
- plexstreams
- Adds a tab to the control panel that allows you to quickly see who is streaming what and at what quality with a small amount of metadata overview at a glance.
- Unraid Connect
- Enables Connect functionality on Unraid’s website which allows for remote access through their own servers
- Unraid Patch
- Enables one click downloading and updating with most current patches from Unraid
- Tailscale
- Allows for the spin up of the Tailscale VPN service without needing the array to be started (we’ll talk in much greater depth about Tailscale shortly)
Tailscale
Tailscale is a zero-config VPN service that I consider to be nothing short of pure magic. It employs the WireGuard protocol to provide fast, lightweight, and encrypted tunnels through existing internet infrastructure. For me, the level of simplicity to setup Tailscale on just about any device I can think of is the main benefit. The mesh network approach that Tailscale employs also provides connectivity between ANY of the computers enveloped in the network, regardless of physical location as well. For me, Tailscale is used for a grand multitude of applications, but the first I encountered was remotely accessing my Unraid server’s management dashboard and relevant docker webUIs. For the dashboard, this just means saving the relevant bookmark using the server’s Tailscale IP instead of the local one, and this works like a charm. Unfortunately though, when trying to access docker webUIs, the Unraid dashboard tries to serve up the local version of the webUIs. As such, I went searching and found Homarr, a customizable home page to interact with the docker containers on their own. For example, setting up UpSnap’s Homarr widget looks like the following:
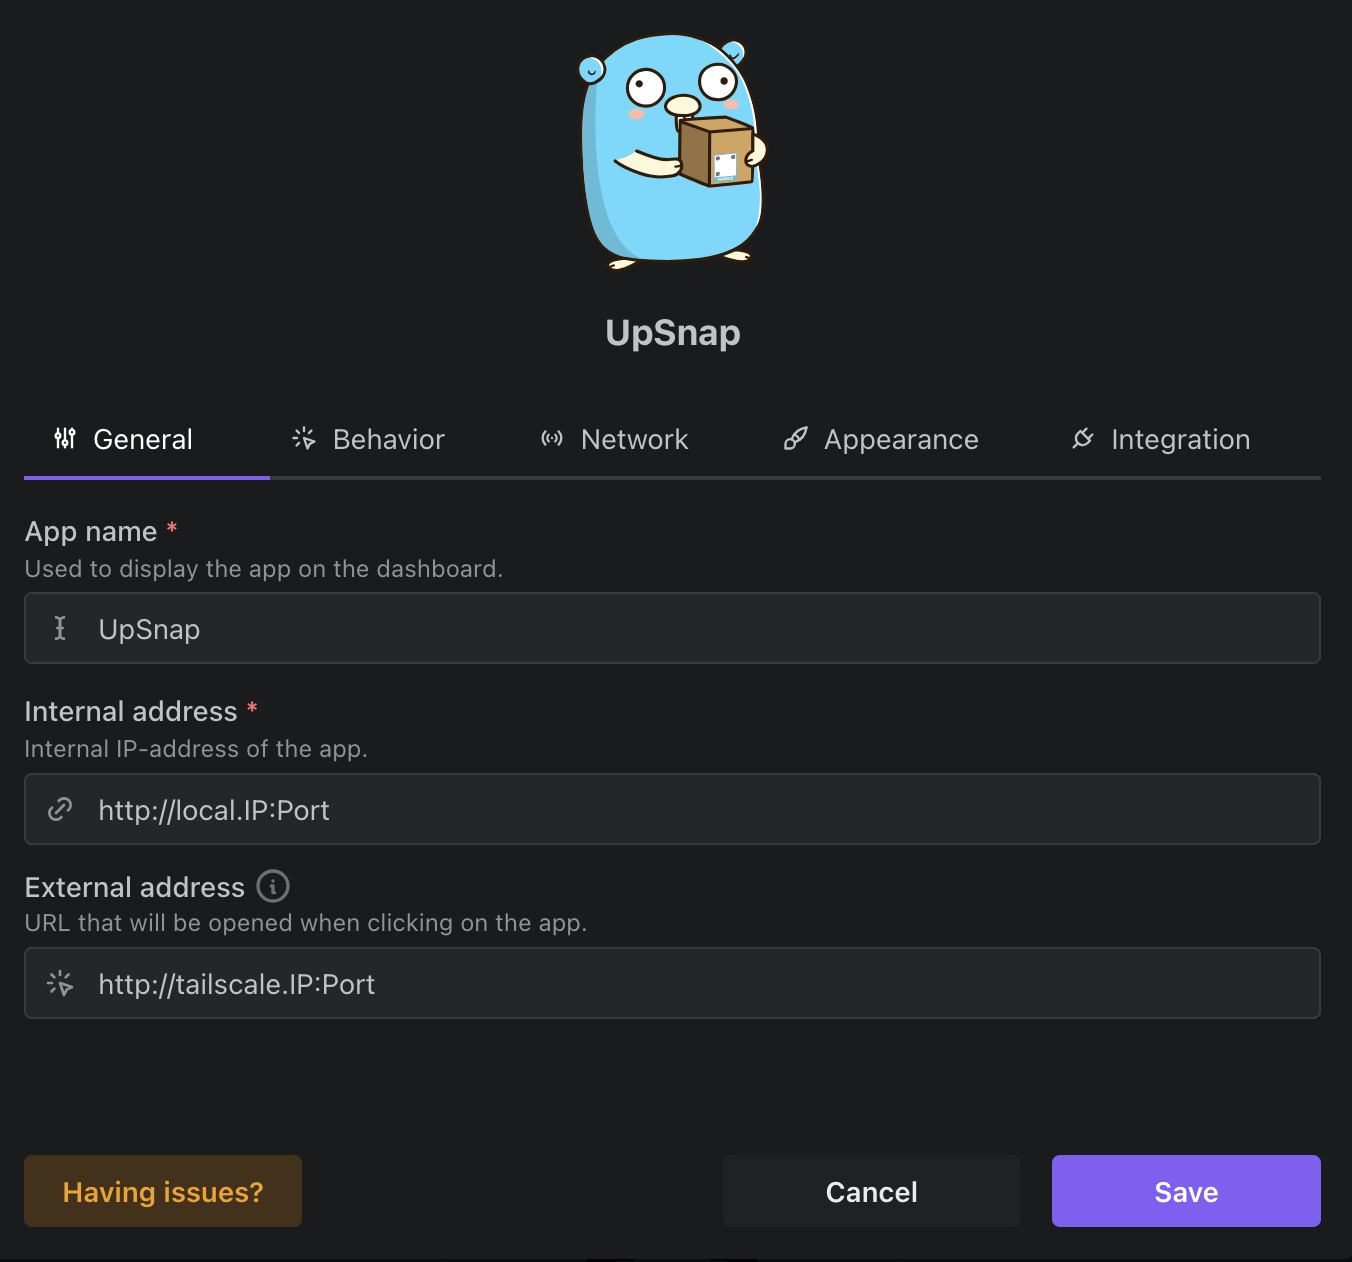
This will create a little widget on the dashboard among my other docker containers I wish to access externally, and when clicking any of these widgets it will take me to their relevant webUI. This gives me the freedom to change the configs, access resources, or essentially do whatever I please with these containers entirely remotely. As I previously mentioned, Tailscale is also a phenomenal tool when it comes to the various VMs I have set up on Unraid. Being able to remotely access these systems either through SSH or Remote Desktop is a godsend when I am not on the same network as them. It also enables the secure transfer of files between machines as it hugely simplifies my SFTP transfers by using Tailscale nicknames instead of having to setup entire profiles on the relevant FTP clients for each and every machine I have. Overall, I really love Tailscale, and hope it garners greater adoption in the homelab and enterprise spaces alike.
Workflow/Outcome
Overall, I think the greatest benefit that this server has provided me is in aiding my daily workflow. The aforementioned "master coding node" virtual machine is what immediately comes to mind when considering my improved workflow, as it is my one stop shop for all things programming (which happens to occupy large parts of my day, everyday). Apart from that, having any utility I can think of for day to day tasks containerized, perpetually available, and ready at my beck and call is hugely useful. I think that setting up and managing this server has also been a phenomenal learning opportunity and has provided me with a much greater appreciation for, and in some cases love for, the work that system administrators and service managers have to undertake each and every day. I hope to continue learning and growing with this server, and hope to continue expanding my homelab as the years go on.Miscellaneous/Addendum
I want to take a moment to acknowledge the various forums and support boards that have helped me out immensely throughout my learning process, and that I highly recommend for anyone starting out in the hobby. These include but are not limited to:I also want to briefly speak on some recent hardware acquisitions that don’t quite fit into the original chart layout for the server build. The first of these is a CyberPower UPS (uninterruptible power supply) that a buddy of mine found abandoned outside of his IT job, and who with the aid of some new batteries is running a charm for my server now. I recommend NUT (Network UPS Tools) for Unraid, or just the built-in UPS management if that suffices for your needs. The other acquisition is one I had my eye on for quite sometimes, and that is the sipeed NanoKVM-PCIE. This is a KVM over IP that has Tailscale built into it, and that I have found fairly useful for remotely powering on my server, and doing a mild amount of headless monitoring. This solution is extremely inexpensive for what it provides, and I appreciate that it uses a forward looking RISCV architecture, and provides everything I personally need from a KVM over IP. That being said, I’m not sure I can necessarily “recommend” the device as this video by apalrd’s adventures outlines a number of security concerns he has with regards to the NanoKVM. I have personally not encountered any issues, and the NanoKVM GitHub (which provides all of the code in an open-source and transparent fashion) demonstrates that the developers have seemingly addressed or are in the process of addressing most of aparld’s concerns. Some viable alternatives are the almighty (and all-pricey) PiKVM, and the intriguing JetKVM which I might snag for myself in the near future for comparison as well, though it is a bit more than a NanoKVM. That’s all for now, thanks for reading all the way down here! :)